Bump Map generator
This is a beta version of a program to create bump/altitude maps from input images (global maps in simple cylindrical projection or spacecraft images of small areas).
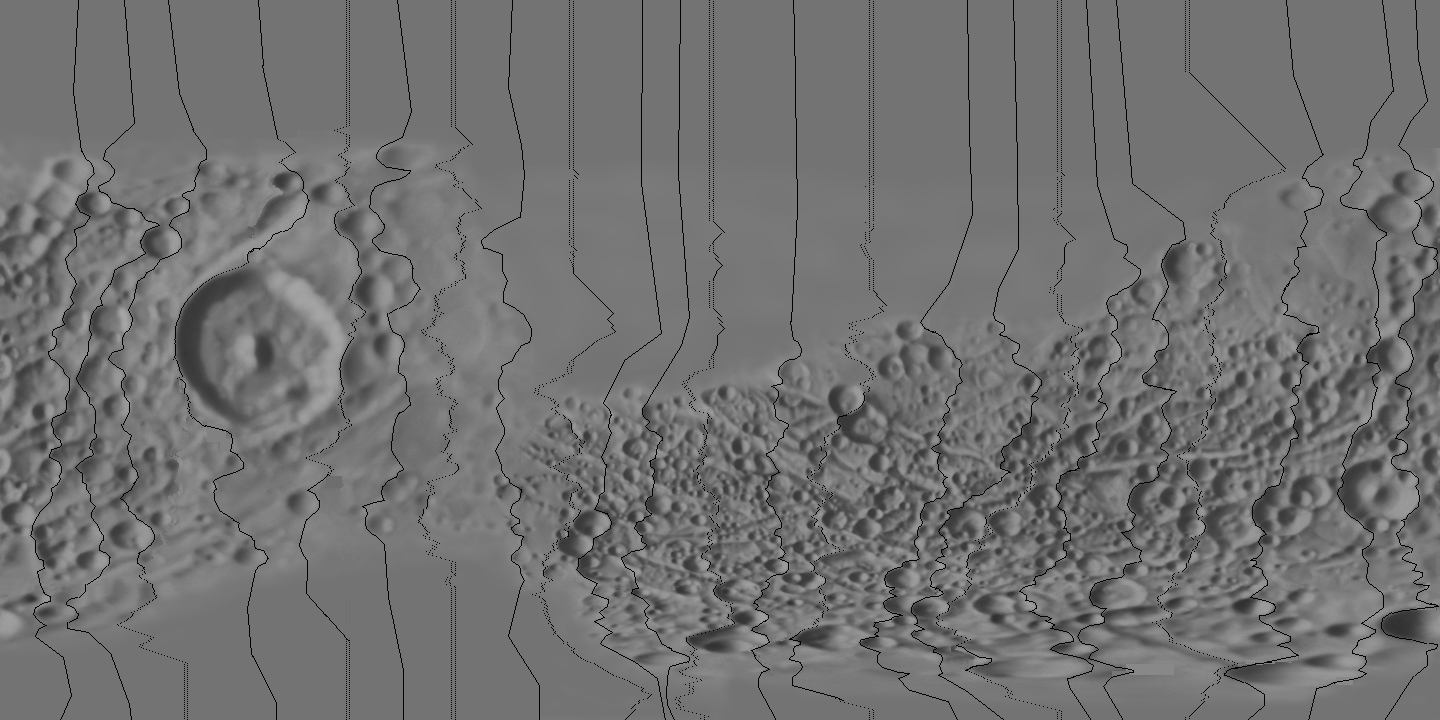
It works by scanning the input image line by line in the horizontal direction. Currently the lines are processed completely independently of each other. The drawback to this is that horizontal stripes can appear in the output image, especially if the input image is noisy, has albedo features or self shadowing.
Installation
The bumpmap.zip file contains just one file, the program executable. Simply unzip it into a directory on your computer and then run the program (bumpmap.exe) from there.
Using the program
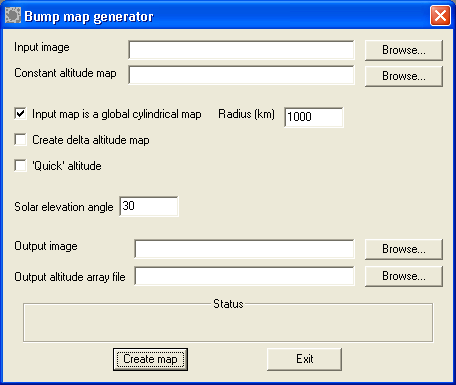
When the program is run the following window appears:
The window has the following items of interest:
Input image: This is the image or texture map you want to 'convert' to a bump map. It can be either a map in simple cylindrical projection or a 'flat' image like a spacecraft photo. The input image can be in PNG, TIFF or JPG format. Using JPG is not recommended unless you have nothing better because JPG images can contain compression artifacts.
Constant altitude map: A map containing one ore more completely black lines from top to bottom. Each line specifies a surface of constant altitude. The altitude does not need to be perfectly constant but these lines should not cross craters, ridges or similar features. Using this map is optional but using it can greatly reduce the amount of spurious, horizontal stripes in the resulting bump map. The best way to create this map is to take a copy of the input image and brighten it a bit to ensure no perfectly black pixels appear in the map. Then manually draw the black lines onto the map. This map can be in PNG, TIFF or JPG format but using JPG may not work because the altitude lines need to be perfectly black and JPG compression artifacts can easily mess up the lines.
Input map is a global cylindrical map: Check this if the input map is a global cylindrical map or clear this if it is a 'flat' map, for example a spacecraft photo.
Radius (km): This is only applicable if the input image is a cylindrical map. The only thing this is used for is to calculate the altitude range values that are displayed when the bump map is ready, this number in no way affects the resulting bump map.
Create delta altitude map: If this is checked you will get a map depicting the altitude change for each pixel instead of an altitude map. Usually you will want an altitude map.
'Quick' altitude: An experimental feature, this should usually not be checked.
Solar elevation angle: The solar elevation angle in degrees. If the sun is shining from directly above this angle is 90. The sun must be shining from the west. If not you need to rotate and/or mirror the input image before using this program. It is not necessary for the sun to be shining exactly from the west but it should be close to that. In the airbrushed cylindrical maps of e.g. Saturn's satellites the sun is usually shining from the west at an altitude of 30 degrees. If the input image is a spacecraft image this angle is also assumed to be constant which is not a correct assumption unless the image covers a small area (like many of the 'postage stamp' Galileo images of the Galilean satellites). Also this can create problems for images showing areas near the terminator. This will be fixed in future versions.
Output image: The resulting bump map. This file will always be a grayscale 16 bits/pixel PNG image which can be be used directly in many rendering programs. The lowest altitude will be represented by black and the highest by white. If you plan to retouch this image in something like Photoshop (usually necessary) please note that Photoshop will read this in at 8 bits/pixel. This is OK except that you'll lose some vertical resolution. Most image processing software behaves similarly but rendering software can usually use the full 16 bits.
Output altitude array file (optional): If a filename is given here a binary array of floating point values will be saved, representing the altitude. Not needed except in special cases.
Once you have filled in what's applicable click Create Map.
Example data
This map can be used as an input map:

Please note that it can be a great idea to retouch the input map in Photoshop before using it as input into this program. Eliminating albedo features is necessary, especially high contrast ones, since they will be confused with altitude variations. Also it is a good idea to remove prominent self shadowing, e.g. creater floors that are black not because they face away from the sun but because they are in shadow caused by the crater walls.
And this one can be used as a constant altitude map:
The black lines do not need to be 'discontinuous' as in the image above but for each line there must be a black pixel in every line.
Also experiment to see what happens if you omit the constant altitude map !
Possible future improvements
It may be possible to reduce the amount of horizontal lines by post processing the map, both by scanning for horizontal stripes that do not correspond to anything in the input map and to search for steep features whose presence is inconsistent with the appearance of the original map. Also a much more complicated algorithm than horizontally scanning a single line at a time is a possibility.
At present it is assumed that the input image is Lambert shaded. This is a very inaccurate assumption. Support for more shading functions will be added.